To contact us Click
HERE

Is there anything better than a sweet, crumbly and cinnamony streusel topping? A few weeks ago, I would have said no. Until I made this incredibly delicious banana coffee cake and added chocolate chips to an already amazing crumble. I absolutely adore banana bread, and I always have bananas on hand. Unfortunately, my bananas like to turn brown way faster than I can manage to eat them all, especially in the warmer months. It's just as well though, because overripe bananas mean it's time to do some baking and there's nothing wrong with that! But I have to say, as much as I love classic banana bread, I'm pretty tired of it. I wanted something new and interesting and an even better reason to convince myself that coffee cake is a perfectly acceptable breakfast food. Okay, so maybe this is way better as an afternoon indulgence or a sweet after dinner treat. It is VERY chocolately. Make sure to have some almond milk on hand. Or better yet, my Raw Vanilla Cashew Milk. There's nothing wrong with that either!

This is the crumb topping that I refused to put nuts in. Because that would ruin it. Unless you love nuts, in which case, add whatever you like and ignore what I said about it being ruined.

The batter is very thick and sticky, which is good because it will hold it's layers when you spread it into the pan.

How could you even resist this?? It has an amazing trio of flavors combining your favorite classic moist coffee cake with banana, chocolate and cinnamon. In fact, it has an almost 'Mexican Chocolate' flair to it, like a tall cup of Abuelita Hot Cocoa. Mmmmm.
Banana Chocolate Chip Coffee Cake
Adapted from Epicurious.com
Batter:
1 1/2 C all purpose flour
3/4 tsp. baking soda
3/4 tsp. baking powder
1/4 tsp. salt
1/2 C sugar
1 stick butter, softened
1 egg
3 bananas, overripe and mashed
3 T buttermilk
Butter and flour an 8 x 8 baking dish.
Heat the oven to 350 degrees.
In a large bowl, cream butter and sugar. Add the egg, buttermilk and bananas. In a smaller bowl, combine the dry ingredients. Carefully add the dry ingredients to the wet, and stir just until combined.
Streusel Topping:
1 1/4 C chocolate chips (I prefer semi-sweet)
2/3 C brown sugar
1/2 C whole oats
1 T cinnamon
Combine all ingredients in a small bowl and mix. Pour 1/2 of the coffee cake batter into the pan. Sprinkle half of the streusel over the batter. Carefully spread the remaining batter into the pan, and sprinkle evenly with the remaining streusel. Bake for 45-50 minutes or until a toothpick comes out clean. Or covered in melted chocolate.
Enjoy!


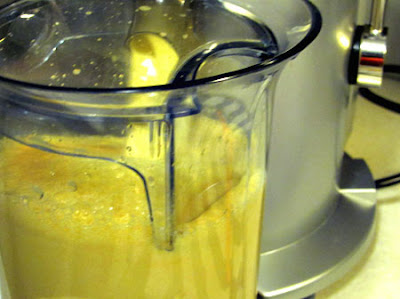 There's a movie out called "Fat, Sick & Nearly Dead." Have you seen it? The movie was really interesting and is about how a juice diet worked out. (The link goes to the trailer.)
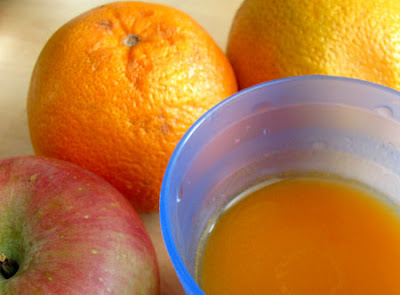 Apple-Carrot-Orange Juice
 Carrots, oranges... bright and sunshine-y, perfect for a special occasion! With TLC you can taste. Hand grated carrots, fresh chopped walnuts, and orange juice squeezed the minute you need it. Everything as fresh as possible. Just like spring.
 Everyone will be like "-This- is carrot cake?" Yes, my friends, this is how it's supposed to be. At least in my little corner of the universe.
 Mixing the buttermilk-and-baking soda into the batter.
  Adding the grated carrots and walnuts.
 Fresh-squeezed orange juice.
 Carrot Cake
 *Don't worry! The glaze -will- soak in. It might take a couple of applications and a few minutes, but victory will be yours! (If the sugar isn't 100% dissolved it will make the glaze a little more crunchy - at least that's my theory.) Don't take this as me being "down-with cream cheese frosting" I'm a fan of the cream cheese, but an irreplaceable part of this particular cake is the orange glaze--no contest.
 Recipe Source: My mom (Thanks mom!)
 Why start this post with sunflowers? My sister Janel and I picked some up at the Sunflower Market grocery store earlier this summer after kicking around at the downtown Salt Lake farmers market where we shared Sudanese food, sipped blueberry lemonade and I bought a tomato that was too expensive. And so sunflowers... time with my sister... and we arrive at... her recipe for Chile Verde.
 The beginning of the Crock-Pot phase below. Everybody into the pool!
 And "poof" it's done!
 My daughter and I took a road trip to Oregon where we followed the Pacific Coast Highway 101 from Astoria down to Florence. We saw all sorts of neat things like waterfalls along the Columbia River Gorge, Haystack Rock, the Devil's Punchbowl--it's a neat place to visit! While we were there we were able to catch up with one of my daughters friends and his family. They offered to make us homemade Venezuelan food for breakfast. His mom, Keyla, made arepas which are flat biscuits that are crunchy on the outside and soft on the inside. They were served hot so when you add cheese, it gets kind of melt-y. We made sandwiches of cold cuts and cheese and they gave me a package of PAN corn flour so I could try making them at home. They said use equal parts of flour to water and showed me the texture of the dough. His dad also explained that I could also replace some of the PAN with whole wheat flour to make them healthier. This morning I pulled out my cast iron skillet and gave the recipe a try.


 Frozen Lemonade2-3 C ice1/3-1/2 can lemonade concentrate1+ C water
 I always have cherry tomatoes on hand (unless there is something completely wrong with me) because they are my absolute favorite. They are always slightly sweet and juicy and they go well in everything from salad to spaghetti sauce. I also happen to have a new pot of basil that I'm nursing in my backyard and praying that the snails don't find. Growing herbs is a great way to give yourself multiple meal options as it opens up the variety of flavor profiles you can create. And a leftover tub of baby mozzarella balls gave me the idea to make a caprese salad. But seeing as I can have caprese salad anywhere, I decided to spice it up and make it a Roasted Caprese salad. Since I felt like the salad would need a little extra weight behind it to make it a meal, I added the rest of the whole wheat Israeli (or Pearl) Couscous I had in the pantry. Instant classic.
 I coated the tomatoes in Olive Oil, salt, pepper, italian herbs, a little garlic and a splash of balsamic vinegar. Then I broiled them....
 And they came out like this, perfectly charred and caramelized.
 I chopped up the basil and sliced the mozzarella balls in half. You don't have to halve them, but I wanted more cheese throughout the salad.
 And here it is, a perfect summertime meal that took about 15 minutes to prepare. I added a few slices of grilled chicken over the top because my basketball playing husband needed some extra protein, but this would make an awesome lunch or dinner just as it is. You should probably make extra.